
This website is supported by its readers. If you click one of my links I may earn a commission. I am also a participant in the Amazon affiliates program and I will also earn a commission from qualified purchases.
Recently, I’ve been wanting to add a new coniferous bonsai to my collection. Whilst I already have a juniper, one species I finally decided to invest in was a Scot pine bonsai. This got me thinking, what is the best Scots pine bonsai training technique?
To train a Scots pine bonsai, remove any weeds or moss from its topsoil. Then remove any pines that are more than two years old or elongated candles that will be growing. Wire into place and move into a brightly lit outdoor area. Avoid keeping Scots pines in shady areas.
So what exactly are the advantages and disadvantages of a scots pine bonsai? And is it possible to grow a Scots pine bonsai from scratch? Keep reading to find out more!
Just a quick heads up, over the past three years of running Plantpaladin, hundreds of people have asked for product recommendations. As such, You can find my favorite indoor bonsai tree here (link takes you to Bonsaiboy), my favorite outdoor bonsai tree (link takes you to Bonsaiboy), or have a look at all the products I recommend here.
Scots pine bonsai training
Training bonsai is tough – there are no two ways of getting around it!
Constant water care, sunlight, temperature requirements, pruning, and debugging are all regularly required to train and grow bonsai.
Coniferous species due to their needle-like leaves can be more challenging than decisions or succulents like jade bonsai.
With me recently buying a brand new 10-year-old Scots pine, I needed to research the best way of maintaining, caring, and most importantly learning more about scots pine bonsai training.
Luckily, I got in touch with my local botanical gardens, spoke with a few experts, and even did a quick survey of 20 plant paladin readers to find out their Scots pine bonsai training methods.
To train a scots pine bonsai then:
- Ensure it is the right time of year
- Come up with your scots pine design
- De-weed your topsoil
- Repot your scots pine bonsai
- Create bonsai deadwood
- Remove the large candles from the scots pine
- Remove any needles older than 2 years
- Trim any branches
- Wire your scots pine into position
- Keep your scots pine in direct sunlight (even in winter)
- Maintain the health of the Scots pine.
- Repeat the process.
Let’s explore these in more detail:
Ensure it’s the right time of year
Before you even think to start scots pine bonsai training, the most important thing to keep in mind is that it is the right time of year.
Whilst most bonsai pruning and maintenance is undertaken in trees during the first few weeks of spring – especially in coniferous species – this is a little different for Scots pine.
Scots pine and other coniferous trees hold a lot of sap, and so pruning them early in the year will make things more difficult.
Ensure that you are training your scots pine bonsai near the end of summer between August and September, At this time of year, your tree will still have time to heal without removing the valuable nutrients that are found within the tree’s sap.
Come up with your scots pine design
The next step in scots pine bonsai training is to come up with the correct design for your tree.
One of the major benefits of scots pine bonsai is they are super versatile and can be molded pretty much into any bonsai tree style such as moyogi, windblown, or cascading styles.
As such, I always find that drafting up a rough idea on pen and paper of how exactly you want your scots pine bonsai to look before you start pruning or wiring will work wonders in giving you something to aim for.
You can always modify this design a few years down the line to start with.
De-weed your topsoil
The next thing bonsai owners need to do when training their scots pine bonsai is to de-weed the topsoil.
Whilst most bonsai are planted in small, shallow (and expensive) pots with a small surface area, even this topsoil is enough for small weeds to start growing.
As such, it’s important that before any wiring or pruning is undertaken that the topsoil of the scots pine bonsai is checked thoroughly for signs of weeds.
Use a pair of pliers to pull these out directly including.

These weeds are likely going to be smaller than common garden weeds so use a pair of tweezers if need be to help.
On top of regular weeds, moss is also commonly found in bonsai.
Whilst moss such as sphagnum moss can add to the aesthetics of a tree, having too much moss can cause excess moisture to build up – overwatering your tree.
If then you do not like the look of the moss your tree is collecting, use a pair of pliers and gently remove this from the scots pine bonsai.
Repot your scots pine bonsai
For a lot of you, this step will only be necessary if you have not repotted your bonsai tree in the past 2 years or so.
This can be determined if the roots of your bonsai have started poking through the topsoil or your Scots pine has outgrown the pot it is in.
If then you need to repot your Scots pine – this step would be when you do it.
Repotting bonsai is a topic all unto itself with its unique challenges.
Luckily I’ve written a post that talks all about how to do this which you can check out here.
To summarise:
- Select the right size pot with enough drainage holes
- Remove your bonsai from its pot using a root hook
- Remove about 70 to 80% of the clumped soil next to the root ball
- Use a sharp pair of scissors and cut any excess roots
- Trim any feeder roots
- Add wire to the base of your pot to secure your bonsai
- Add a base layer of soil to your pot
- Plant your bonsai tree in the new pot
- Secure the tree with wire
- Add topsoil – preferably a good potting blend with akadama and volcanic. Cactus soil can also work.
Once completed it’s important to follow the correct aftercare.
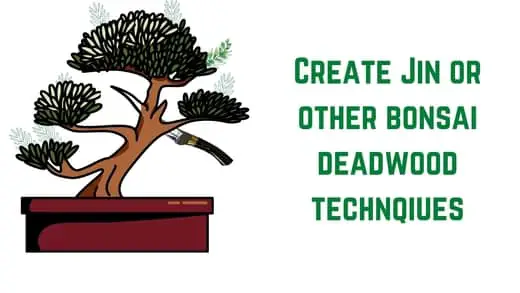
Create bonsai deadwood
At this stage, I like to add bonsai deadwood to a scots pine.
Deadwood and deadwood technique is just the process of removing the cambium and bark or bleaching the color of your tree to give the illusion that part of your bonsai has died – creating deadwood.
If you are interested in creating things like bonsai jin, sabamiki, or even more advanced deadwood such as nebari or a shari bonsai style then this is the stage to achieve it.
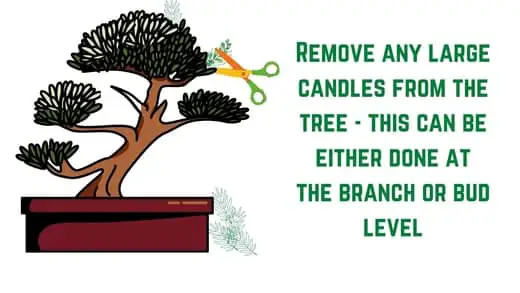
Remove the large candles from the Scots pine bonsai
The next step in scots pine bonsai training is to remove some or all of the large candles from your tree.
While Scots pine bonsai has many needles, during the spring and summer, large candle-like buds start to form on scots pine, on the tips of its branches.
These candles then are the primary places new growth on the tree occurs and so these candles need to be removed to maintain the size and current shape of your tree.
To do this, you can typically remove them by hand however consider using a sharp pair of shears and either cut them back from the branch or bud.
Removing the candles before the needle will also make the process of removing the needles in the next step easier.
Should you want your tree to increase in size then consider leaving your bonsai to grow for a few years.
If you like the look of these candles you can leave some in partially too – preference is more important when it comes to styling your bonsai.
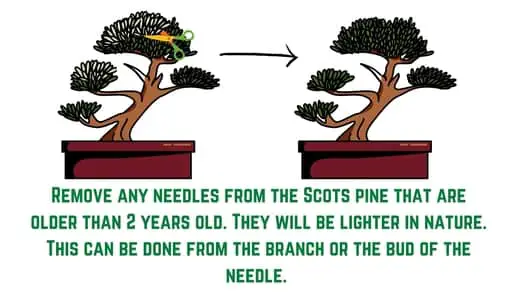
Remove any needles older than two years
Once the candles have been removed or reduced in size, the next step in the Scots pine bonsai training process is to remove some of the excess needles.
After about 2 years the dark green color of the needles will start to fade.
This can leave your tree looking a little water-deficient when in reality they require a good prune.
To do this, use a sharp pair of shears and trim any needles that are lighter in color than the healthy needles or have grown out too long.
Trim these needles back at the bud to ensure new health needles grow in their place.
One of the most important reasons why these needles will be removed is to allow for sunlight.
Having too many needles on your tree will restrict the amount of sunlight it gets – this can severely interrupt the photosynthesis process.
Trim any branches
After removing older needles and candles, your Scots pine bonsai should be a lot easier to trim.
This makes creating the design you drew earlier a lot easier to achieve and will also help with the increased light requirements these trees have.
Now is the best time in the Scots pine bonsai training process to trim back any branches that have grown out excessively.
Trim these branches back where you would like new branches to grow.

Ensure that you do not trim these branches too close to the trunk of your tree which can potentially damage things like nutrient flow.
Wire your Scots pine into position
At this stage, you have a scots pine that has been pruned correctly and designed effectively.
It is at this stage you will want to wire your bonsai and move it into the position you would like it to grow in.
To do this, use a copper wire that is about one-third the size of the thickness of your bonsai branches.
Then, at a 45-degree angle wrap the branches in copper wire, attaching this wire to another branch as an anchor.
Guy wires can also be used for anchor points should your tree not have enough branches for leverage.

Should the branches of your tree be tough to move into position, consider using a smaller wire that is 1mm to 2mm in thickness.
Just be sure that you do not cross these wires together.
Keep your bonsai in direct sunlight
Once all the pruning has been completed it is important to keep your Scots pine bonsai in as much sunlight as possible.
This will help with the healing process and give your tree the valuable food it needs.
Whilst other bonsai need to be kept indoors during winter, Scot pine needs to be left in the sun during the winter.
As such, avoid cold frames and winterize these trees by keeping them outdoors but apply mulch to the topsoil to prevent the plants from freezing.
Maintain the health of your tree
Like other bonsai trees, good maintenance and upkeep are required to successfully train a Scots pine bonsai.
As such, ensure that you water the scots pine only when its topsoil is dry to touch.
Bugs and other pests have been known to hide in the tight spots between pines so regularly check your tree for signs of aphids, spider mites, slugs, scale, and caterpillars.
These plans should only be fertilized once per month during the summer month.
Repeat the process
Like all things bonsai-related, a great deal of patience is required when creating and training these trees.
As such this process will need to be repeated about once per year to continue to train and grow your tree the older it gets.
You can add methods such as trunk chopping or bonsai defoliating to further enhance the look of the tree.
Rome wasn’t built in a day and neither was the perfect bonsai tree and so stick to these steps and within a few years, you can have an incredible-looking Scots pine bonsai tree.
FAQs about scots pine bonsai
So now you know how to train a Scots pine bonsai, I’m sure some of you will still have a few lingering questions about the tree.
As such I’ve collated some common questions I have about the tree with some relevant answers
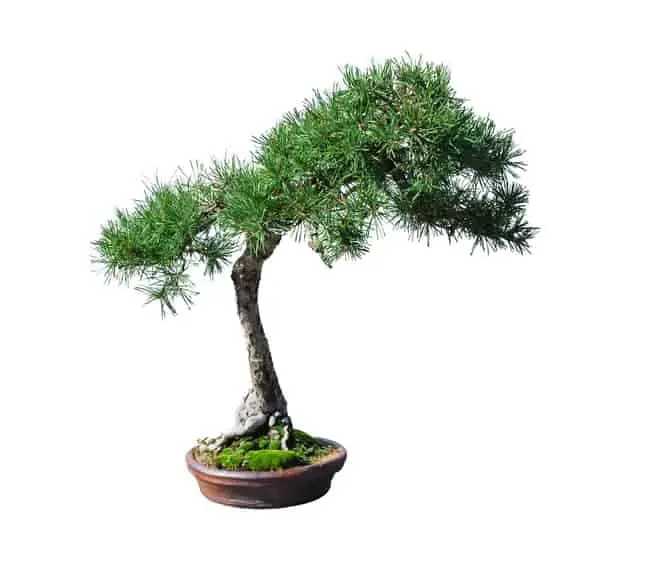
What is a Scots pine bonsaI?
Scots pine bonsai is a bonsai tree created from the Scots pine (Pious Silvestris) species. Scots pine bonsai is a coniferous bonsai that enjoys bright sunny outdoor conditions. This tree has a pleasant pine smell with distinctive needles and candles that make it commonplace in bonsai use.
Can you bonsai scots pine
Scots pine trees are a fantastic species to use for bonsai. Its needles and candles, strong branches, and pleasant smell make it the perfect choice for many award-winning trees. Scots pine works well for almost any bonsai style.
Can you grow scots pine bonsai from scratch?
Scots pine bonsai can be grown from scratch, either with seedling or cuttings. To grow, ensure the cutting is planted in a volcanic soil mix and is treated with root hormone. Plant and fertilize and new growth should be viewed in as little as 3 weeks.
Scots pine bonsai water requirements
Scots pine bonsai typically need to be watered once per day in mild conditions. During the summer the water requirement will increase. Touch the topsoil of the tree – if dry to the touch then watering is required. Touching topsoil should be done twice per day during the summer.
Scots pine bonsai best temperature
The best temperature range to keep Scots pine bonsai in is 10 to 85 degrees Fahrenheit (-12 degrees to 29 degrees Celsius). Temperatures exceeding 90 degrees Fahrenheit (32 degrees C) will damage bonsai and temperatures over 100 degrees Fahrenheit (37 degrees C) can be fatal.
Scots pine trees are relatively similar to other coniferous trees such as junipers – to read up more on this then – check out my post on juniper bonsai temperature ranges.
How to shape a Scots pine?
To shape a Scots pine bonsai, come up with a design, prune back the candles and remove and needles older than two years. Then prune any branches, add deadwood, and use copper wiring to hold them in place. Ensure this is undertaken during the late summer (Aug – Sep).
How to prune a scots pine bonsai?
To prune a Scots pine bonsai, prune back the candles and remove and needles older than two years. Then prune any branches, add any deadwood, and use copper wiring to hold in place. Ensure this is undertaken during the late summer (Aug – Sep).
What bonsai styles work best for scots pine bonsai?
Informal upright (Moyogi), slanting bonsai (Shakan), Semi-cascade bonsai (han-kengai), windswept bonsai (Fukinagashi) and Shari bonsai are the best bonsai tree styles for scots pine. Avoid sumo and broom styles
How often should you repot a Scots pine bonsai?
Scots pine bonsai should be repotted once every two to three years. Scots pine bonsai should only be repotted when its root structure starts to pop out or the tree becomes too big for its pot. Repotting Scots pine can take place both in the early spring to the late summer.
Fertilizing requirements
During the summer a balanced fertilizer should be given to scots pine bonsai once per month. During the winter, only a single dose of low nitrogen, slow-release fertilizer should be given to Scots bonsai during the winter months.
Best time of year to train a Scots pine bonsai?
August and early September are the best months of the year to start training a Scots pine bonsai. All pruning and wiring should be undertaken during this time. This is because there is less sap in the tree than there would be during the early spring.
Repotting can also be undertaken into the late summer but is ideally done during the spring.
How fast do scots pine bonsai grow?
Scots pine bonsai is a relatively fast-growing bonsai. If left unpruned, Scots pine bonsai can grow between 12 and 36 inches per year with most trees averaging 20 inches of growth per year.
Study
Finally, I wanted to include a quick survey I undertook of 20 plant paladin readers asking them their thoughts on if scots pine bonsai were hard to grow – here were the results:

My top picks for the gear you will need!
So like I mentioned earlier, over the past three years of running PlantPaladin, hundreds of people have asked me for my recommendations on the best bonsai gear on the market.
Having spent thousands of dollars on bonsai items these past few years and tested at least 100 bonsai-specific products, I’ve listed my favorite products below – All of which I highly recommend and think you can get great value.
They can purchase directly by clicking the link to take them to Amazon.
Bonsai Tool Set: One of the significant challenges I’ve had is finding a toolset that was not only durable but didn’t break the bank. SOLIGT has recently developed a fantastic bonsai tool set that covers all the tools you need to trim, prune, and repot your trees. – You can grab it here.
Complete Bonsai Set: Many of you will want to grow your bonsai trees entirely from scratch, but finding the varicose seeds, pots, and other items in one place can be challenging. Leaves and Sole then have created a complete bonsai set that I’ve personally used that ticks all the boxes. You can grab it here.
Bonsai wire: The number of times I’ve run out of wire for my bonsai or purchased cheap bonsai wire that doesn’t do the job is embarrassing for me to admit. After a lot of trial and error, I found that using Hotop’s aluminum bonsai wire is one of the best options on the market. This can easily be used for both indoor and outdoor bonsai. You can grab it here.
This post was written by Fehed Nicass who has been passionate about bonsai for over 3 years.