This website is supported by its readers. If you click one of my links I may earn a commission. I am also a participant in the Amazon affiliates program and I will also earn a commission from qualified purchases.
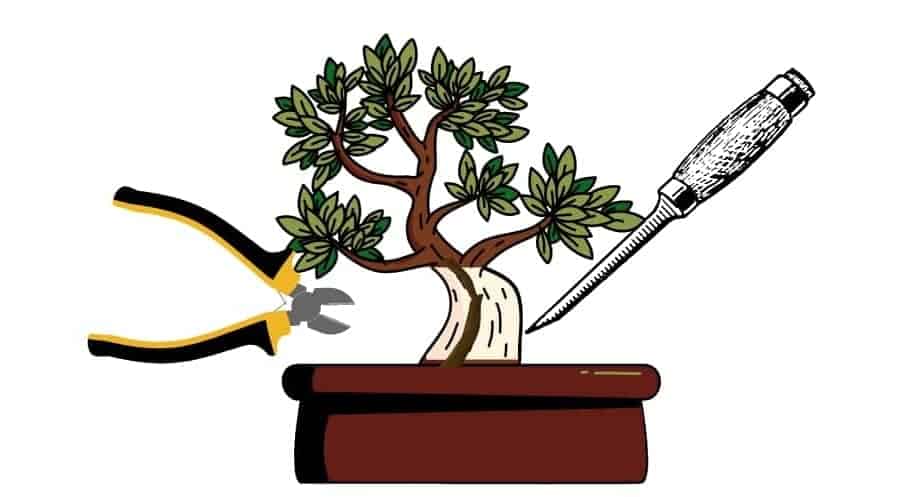 One of the things I always wanted to get around to for my bonsai, was having the split trunk look, giving the impression as though the tree had been struck by lightning. You can imagine how surprised I was to find out about sabamiki bonsai and how common that this technique is.
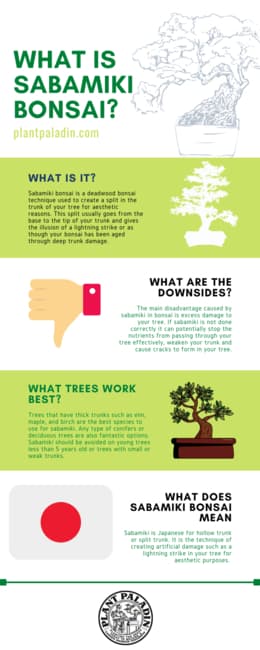
Sabamiki bonsai is a deadwood bonsai technique used to create a split in the trunk of your tree for aesthetic reasons. This split usually goes from the base to the tip of your trunk and gives the illusion of a lightning strike or as though your bonsai has been aged through deep trunk damage.
So how exactly do you create a sabamiki bonsai tree? And what tree species work best for sabamiki? Keep reading to find out more.
Just a quick heads up, over the past three years of running Plantpaladin, hundreds of people have asked for product recommendations. As such, You can find my favorite indoor bonsai tree here (link takes you to Bonsaiboy), my favorite outdoor bonsai tree (link takes you to Bonsaiboy), or have a look at all the products I recommend here.
Sabamiki Bonsai
One of the things that I’m constantly blown away by, as someone relatively new to the art of bonsai, is all the methods used to manipulate and age trees.
Making trees look older, more damaged, and aesthetically pleasing than they would if they were left to grow naturally.
Whilst creating jin on a bonsai is one thing, a more advanced (and in my opinion way cooler) technique that has been used is the process of sabamiki.
To summarize:
- Sabamiki is the process of creating an artificial split in the trunk of your bonsai tree.
- This is done to give the appearance that a lightning strike would to a normal-sized tree naturally
- This technique is used to also make your bonsai tree seem older than it actually is
- Sabamiki is created by removing the bark or cambium from your tree and then using a drill or carving knife to cut out the exposed wood to create a deep wound
- Typically this cut/split will go from the base of your trunk to the tip of your tree
- It is important however that the cut does not go through the entire trunk as this would cut off the valuable nutrients the tree needs – instead opt to carve out no more than 75%
- It’s also advisable to create a natural taper with any split you create where the split is widest on the outside and gradually gets smaller the deeper you go.
Now this is definitely quite a complex process so let’s explore exactly how to do this below:
How to create sabamiki bonsai?
Now sabamiki, like most deadwood bonsai techniques can be a little complicated if you are new to it so I’ve added an image where I think you will need it.
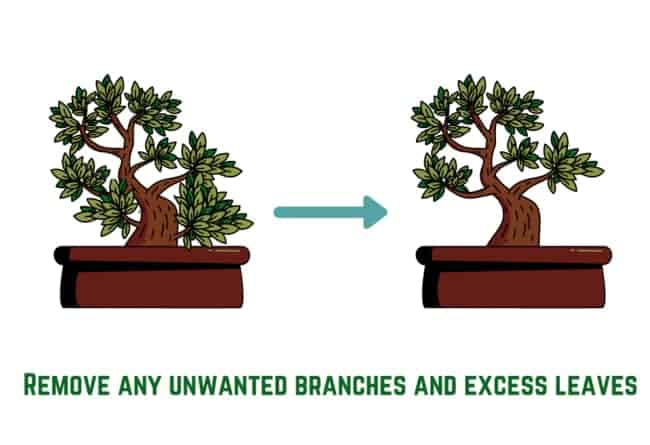
Remove any unwanted branches from your trunk
So this is going to be the first step not only for creating sabamiki but pretty much any bonsai technique you follow.
As we will be carving into the trunk of our tree, it’s important to remove any unwanted secondary or tertiary branches from your trunk that you do not use. I’d also recommend trimming your leaves down too just to make it easier to see what you are working with.
Score the bottom and top of your trunk
Now, this step is almost always forgotten about but I think it’s super important to keep it.
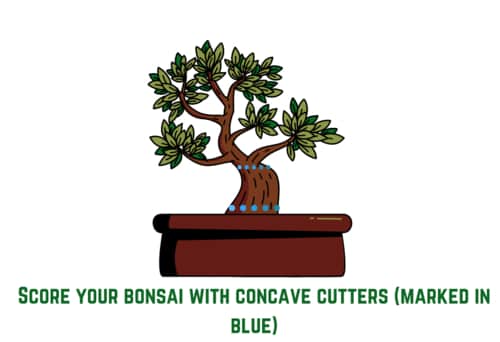
Scoring the bottom and top of your bonsai with concave cutters (or wherever you want the split in your tree to finish) will ensure that any bark or cambium you remove will not affect the parts of your tree that you don’t want the split in.
This will ensure you have a nice smooth cut whilst making sure the nutrients from your roots won’t have trouble getting past through the rest of your tree.
Remove the cambium from your bonsai trunk
So your tree is now prepared for a sabamiki, the next step we need to take is to remove the outer bark – better known as the cambium from your tree.
Because you have scored the tree from with conceive cutters, this process will be a lot easier.
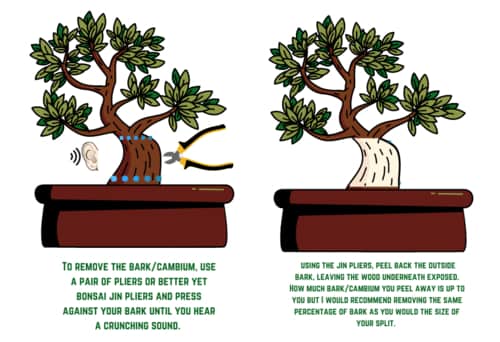
To remove the bark/cambium, use a pair of pliers or better yet bonsai jin pliers and press against your bark until you hear a crunching sound.
You should repeat this 3 to four times.
This will loosen up the outside bark.
Then, using the jin pliers, peel back the outside bark, leaving the wood underneath exposed.
How much bark/cambium you peel away is up to you but I would recommend removing the same percentage of bark as you would the size of your split.
For example, if you want to create a split that goes 75% of the way through your tree bark, then you should also remove around 75% of the outside bark at the same depth of your tree.
Create your split
So now you have exposed the underlying exposed wood, we can make our split.
It’s important that before you do this, you decide on the exact look that you are going for.
If you want the look of a lightning strike on your tree, google some images of lightning strike trees. Alternatively, if you just want the look of an aged split that came naturally looking at images of that should help.
We then need to decide on the tool we will use to create our sabamiki.
Whilst drills can be an effective and quick way to create a split in larger trees, I found that using them makes it a lot easier to damage your tree.
Instead, doing things the old fashion way and using a carving knife like this Kiku carving knife works best.
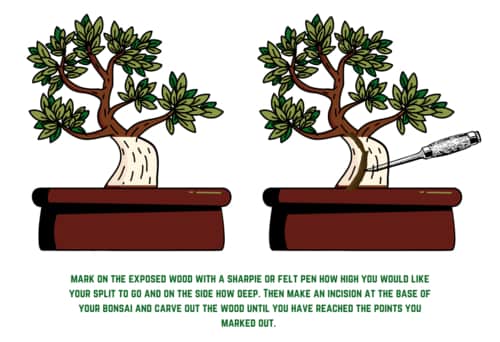
To start, mark on the exposed wood with a sharpie or felt pen how high you would like your split to go and on the side how deep.
Then make an incision at the base of your bonsai and carve out the wood until you have reached the points you marked out.
Preserve your tree
Once you are happy with the results of your split and get it to look exactly as you would like. It’s important to preserve your tree and the wood.
This is because it is very common in deadwood methods for a fungal infection to take place.
Using something then like a wood hardener like Ronseal or Minwax works best.
To preserve the wood, I would recommend doing this once per year, during the summer months.
It’s also important that you avoid doing any treatment after you carve your bonsai for a few weeks as it will likely be wet from the sap.
What are the disadvantages to sabamiki bonsai?
The main disadvantage caused by sabamiki in bonsai is excess damage to your tree. If sabamiki is not done correctly it can potentially stop the nutrients from passing through your tree effectively, weaken your trunk and cause cracks to form in your tree.
What does Sabamiki bonsai mean?
Sabamiki is Japanese for hollow trunk or split trunk. It is the technique of creating artificial damage such as a lightning strike in your tree for aesthetic purposes.
Sabamiki however can be easily confused with many other bonsai terms such as bonsai jin, Tanuki, Shari, uro, and Jin – all of which are also deadwood methods used to create and shape deadwood on bonsai trees.
What trees work best for sabamiki bonsai?
Trees that have thick trunks such as elm, maple, and birch are the best species to use for sabamiki. Any type of conifers or deciduous trees are also fantastic options. Sabamiki should be avoided on young trees less than 5 years old or trees with small or weak trunks.
My top picks for the gear you will need!
So like I mentioned earlier, over the past three years of running PlantPaladin, hundreds of people have asked me for my recommendations on the best bonsai gear on the market.
Having spent thousands of dollars on bonsai items these past few years and tested at least 100 bonsai-specific products, I’ve listed my favorite products below – All of which I highly recommend and think you can get great value.
They can purchase directly by clicking the link to take them to Amazon.
Bonsai Tool Set: One of the significant challenges I’ve had is finding a toolset that was not only durable but didn’t break the bank. SOLIGT has recently developed a fantastic bonsai tool set that covers all the tools you need to trim, prune, and repot your trees. – You can grab it here.
Complete Bonsai Set: Many of you will want to grow your bonsai trees entirely from scratch, but finding the varicose seeds, pots, and other items in one place can be challenging. Leaves and Sole then have created a complete bonsai set that I’ve personally used that ticks all the boxes. You can grab it here.
Bonsai wire: The number of times I’ve run out of wire for my bonsai or purchased cheap bonsai wire that doesn’t do the job is embarrassing for me to admit. After a lot of trial and error, I found that using Hotop’s aluminum bonsai wire is one of the best options on the market. This can easily be used for both indoor and outdoor bonsai. You can grab it here.
