This website is supported by its readers. If you click one of my links I may earn a commission. I am also a participant in the Amazon affiliates program and I will also earn a commission from qualified purchases.
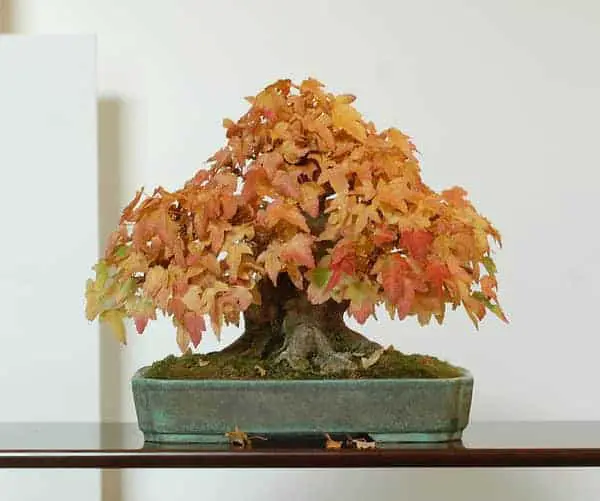
One of the things I genuinely love about bonsai is how even if you have two trees of the same species, depending on the style of bonsai you opt for, you can have drastically different looks. One such style that I’ve recently discovered and started to implement is the sumo bonsai style. So what exactly is the sumo bonsai technique?
Sumo bonsai is a style of bonsai tree. It is categorized as having a thick wide trunk near the topsoil with a gradual taper the higher the trunk grows. Sumo bonsai also have low hanging branches and a wide triangle-shaped leaf canopy. Most deciduous plant species work well for this style.
So what are the advantages and disadvantages of the sumo bonsai style? And what are the exact step-by-step process and sumo bonsai techniques you need to follow to develop a sumo bonsai? Keep reading to find out more!
Just a quick heads up, over the past three years of running Plantpaladin, hundreds of people have asked for product recommendations. As such, You can find my favorite indoor bonsai tree here (link takes you to Bonsaiboy), my favorite outdoor bonsai tree (link takes you to Bonsaiboy), or have a look at all the products I recommend here.
What is sumo bonsai?
Whilst growing and keeping even the most basic bonsai trees can be a challenge, one of the fun aspects of the hobby is transforming and changing a tree to a variety of styles over time.
One of the most popular styles used in ancient times was the sumo bonsai technique.
Now I recently started trying to attempt to create the sumo style from scratch on a Chinese elm.
As such, I got in touch with my local bonsai experts, visited my botanical gardens, and even surveyed 10 plant paladin readers to ask their opinion on exactly what sumo bonsai was.
Here were the findings:
- Sumo bonsai is a style of bonsai tree.
- Its main characteristics are a short, wide trunk that slowly tapers to a thin point, low hanging branches, and a wide triangle-like canopy/crown of leaves.
- Sumo bonsai is typically a fast-growing style with thick roots, as such fast-growing species benefit greatly from this style such as elms.
- Should you have multiple trunks or low branches that you want to turn into trunks, the sumo style of bonsai will work particularly well for this.
- Getting a finished medium-sized sumo bonsai can take upwards of 8 – 12 years to complete.
- Sumo bonsai will often require a lot of pruning, first to develop the wide trunk of the tree and then to develop the thick low branches – as such a lot of wiring and trunk chopping/hacking will be required.
- Avoid using evergreen/coniferous species for this type of bonsai as they often struggle with the amount of pruning and hacking that will be required.
Examples of what a sumo bonsai tree looks like?
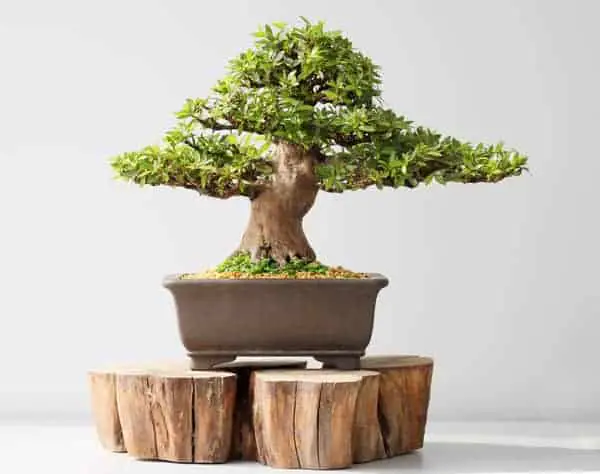
Hopefully, the images below will help you get an idea of what a sumo bonsai will look like once it has been completed.

How to make a sumo bonsai? – sumo bonsai technique
So now we know exactly what a sumo bonsai is and what a sumo bonsai tree looks like? What is the exact step-by-step process of creating the tree?
Luckily I’m following this very process step by step myself and found the following steps to be the natural process of following the sumo bonsai technique:
- Design your sumo bonsai
- Ensure it’s the right time of year
- Decide on the size of your bonsai
- Understand the plant species to use for sumo bonsai
- Store-bought vs growing from scratch
- Plant your tree/cutting
- Fertilize your bonsai thoroughly
- Widen the trunk of your tree using a sacrifice branch
- Prune the tree back
- Widen the trunk of your tree using a bonsai tourniquet
- Chop your bonsai trunk
- Create low branches
- Create a v-shaped canopy/crown
- Be patient
Let’s explore these in more detail.
Design your sumo bonsai
So the first step of designing a sumo bonsai that I feel a lot of people miss out on is to draw a rough outline of exactly how they want their bonsai to look.
Whilst part of the fun of growing bonsai is not knowing exactly how they will look, I found that coming up with a rough sketch with a pen and paper will grove you something to aim for.
You can always change this design a few years into growing your sumo bonsai but having a bit of direction as to how you want your tree to look will make the process a lot easier.
Ensure it’s the right time of year
One of the most crucial aspects of following the sumo bonsai technique is ensuring that whatever growth and pruning you create is done at the right time of year.
The best time of year then, to start a sumo bonsai project will be the early spring, ideally, the first few weeks of march works best.
This is because bonsai trees and specifically deciduous bonsai which are the perfect plant species for sumo bonsai only grow during the spring and summer.
This will maximize the amount of time your bonsai will have to heal and recover from the significant pruning and chopping it will go through.
Decide on the size of your sumo bonsai
Next up is to get an idea of how large you would like your sumo bonsai to become.
Whilst there is no right or wrong classification as to how large a bonsai tree should become, most sumo bonsai are typically small to medium.
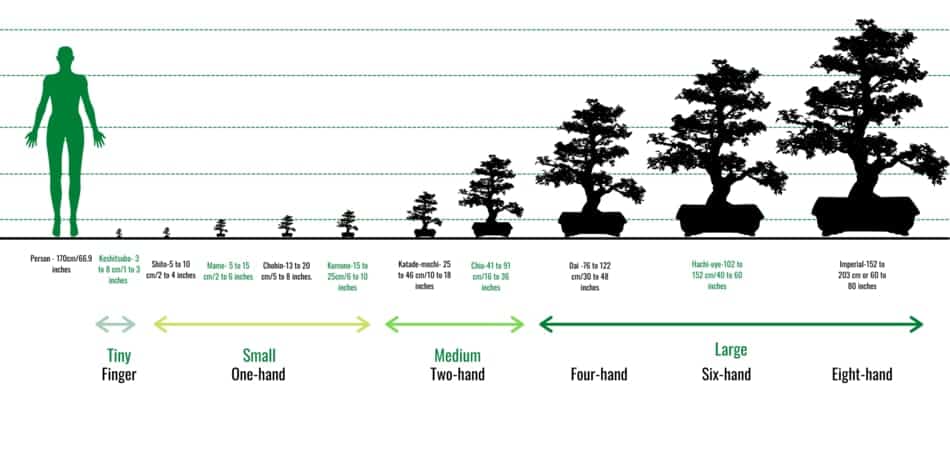
This means the sumo bonsai are typically between 5 and 18 inches large falling into the Chohin, Kumono, and Katade-mochi categories.
Whilst you can grow a sumo bonsai that is larger in size you might find that it is slightly more difficult to manage.
If you do decide to go down this route feel free to check out my post on bonsai size classification or check out the table below which should help:
| Classification | Size inches | Size Centimeters | Hand size | General size |
| Keshitsubo | 1 to 3 inches | 3 to 8 centimeters | Fingertip | Tiny |
| Shito | 2 to 4 inches | 5 to 10 centimeters | One-hand | Tiny |
| Mame | 2 to 6 inches | 5 to 15 centimeters | One-hand | Small |
| Chohin | 5 to 8 inches | 13 to 20 centimeters | One-hand | Small |
| Kumono | 6 to 10 inches | 15 to 25 centimeters | One-hand | Small |
| Katade-mochi | 10 to 18 inches | 25 to 46 centimeters | Two-hand | Medium |
| Chiu or Chumono | 16 to 36 inches | 41 to 91 centimeters | Two-hand | Medium |
| Dai or Omono | 30 to 48 inches | 76 to 122 centimeters | Four-hand | Large |
| Hachi-uye | 40 to 60 inches | 102 to 152 centimeters | Six-hand | Large |
| Imperial | 60 to 80 inches | 152 to 203 centimeters | Eight-hand | Large |
Understand the plant species to use for sumo bonsai
As sumo bonsai are amongst the oldest styles of bonsai trees, most tree species work well for the sumo bonsai technique.
That being said I would stay away from coniferous species.
This is because a lot of trunk chopping will be required to achieve the wide trunk sumo bonsai require.
Coniferous and evergreen species such as junipers and pines do not react well to excessive pruning.
Instead, opt for deciduous species.
In my opinion species such as Chinese elm, oak, maple, and ficus all are fantastic options for the sumo bonsai technique.
Another consideration you will have to make is the amount of time these plants take to grow – if you are planning on creating a sumo bonsai from scratch.
If you think you aren’t the most patient person in the world then finding a relatively fast-growing species will help.
To find out which species grow the fastest, check out my post on how big bonsai trees get here – or check out the table below:
| Bonsai species | Growth type | Average growth per year |
| Chinese Elm | Fast | 12 to 36 inches |
| Juniper | Moderate | 5 to 12 inches |
| Jade | Slow | 2 to 5 inches |
| Maple | Fast | 12 to 36 inches |
| Fukien Tea | Slow | 2 to 5 inches |
| Ficus | Fast | 12 to 36 inches |
| Wisteria | Slow | 2 to 5 inches |
| Cotoneaster | Moderate | 5 to 12 inches |
| Pine (most varieties) | Fast | 12 to 36 inches |
| Azalea | Slow | 2 to 5 inches |
Store-bought vs growing from scratch
The final preparation step before we start growing a sumo bonsai is to decide if you want to grow your bonsai from scratch using a cutting or seedling or if you want to get an existing store-bought tree.
Growing a sumo bonsai from scratch or seedling will be a lot more difficult as creating sumo bonsai typically works better in older more mature trees.
Growing sumo bonsai from a seedling does give you full control of how the tree will look and is a much more rewarding experience.
Buying a store-bought tree will bonsai save you a lot of time and effort in the growing process, but can lead to a lot more mistakes and can leave a lot of scars on your bonsai.
This decision is one you have to make for yourself but the rest of the steps in this post will cover the process for both growing your bonsai from scratch or using an existing store-bought tree.
Plant your tree/cutting
Now the fun begins!
Finally, it’s time to start the process of actually growing a sumo bonsai.
Let’s start by planting a store-bought tree
Planting a store-bought tree
Planting an aged store-bought bonsai tree such as a Chinese elm or a ficus tree is a relatively simple process to follow.
It’s simply a case of moving your tree from the store-bought pot and then repotting it into a new pot.
You can read up on the full process on my post here however to summerise the key points:
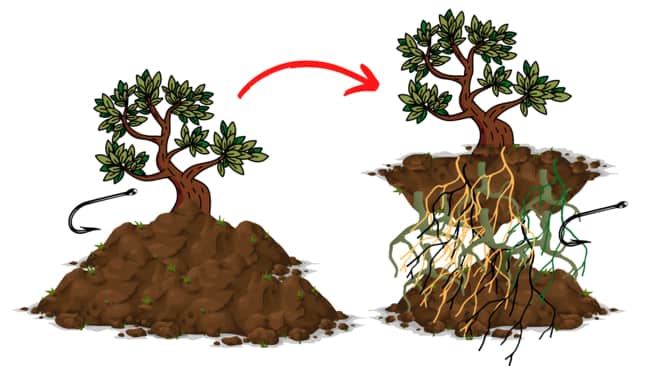
Use a root hook to go around the side of the store-bought bonsai pot
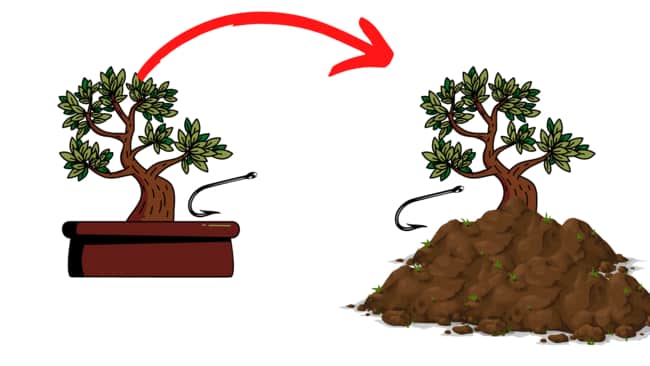
Remove the existing soil and clumps using a root hook – aim to remove around 70 to 80% of this soil until you are left with the root ball.
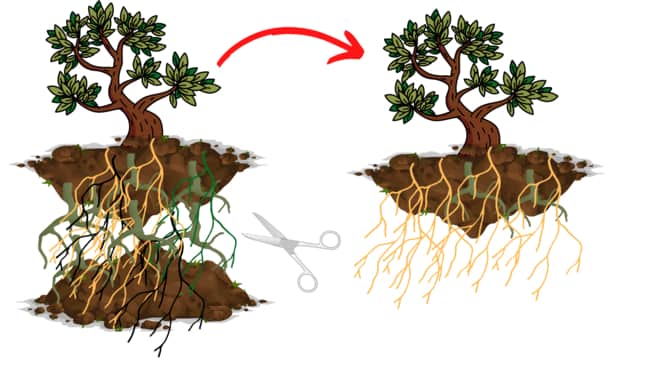
Remove and cut and excess roots with a sharp pair of scissors or cutting knives.
Then in your new bonsai pot, ensure it has enough drainage holes and applies a wire mesh at the bottom of your pot.
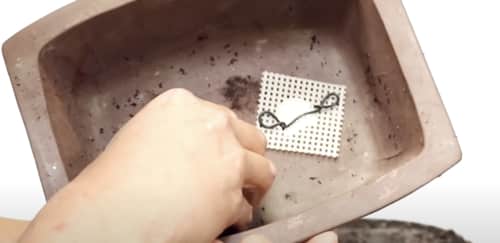
Apply a copper wire loop to this mesh that will help keep the drainage hole in place.
Once complete you then need to add a copper wire to the mesh of your bonsai to hold your tree in place.
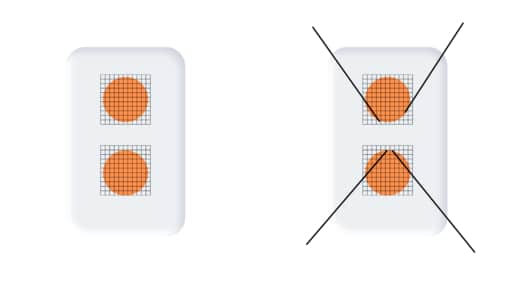
Then plant your tree and ad a good mix of bonsai potting soil to your pot.
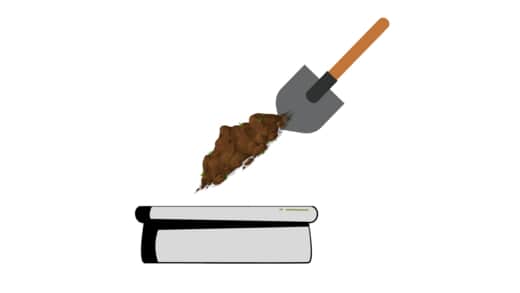
Finish off by securing the bonsai with the wires to the tree.
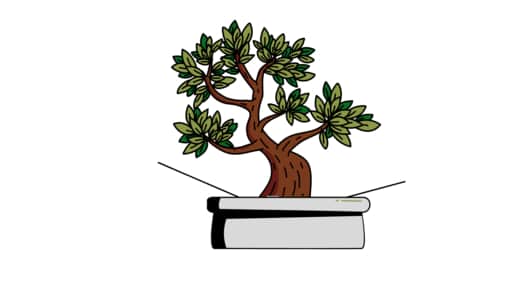
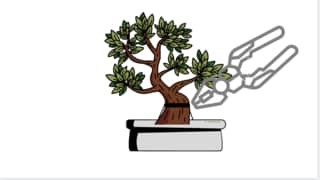
Leave your tree to grow in the new pot for 1 to 2 years and your bonsai will be ready for the sumo bonsai technique.
Ensure that whenever you repot any type of tree, correct aftercare is maintained.
Planting a cutting/seedling for sumo bonsai
Using a cutting/seedling for a sumo bonsai is a much more difficult process so I would strongly recommend having a look at my post on planting a bonsai cutting.
Again however I have summarised the key points here.
Cut the branch to make a cutting at a 45-degree angle.
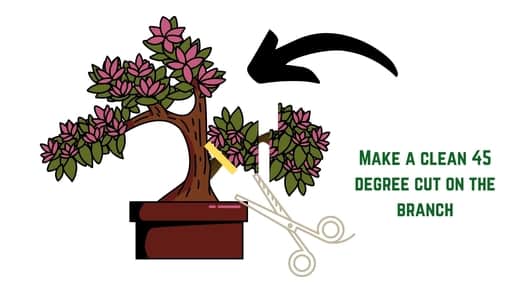
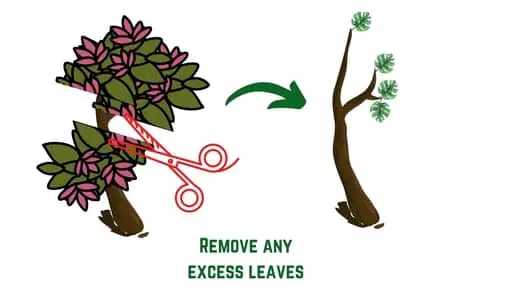
Remove any excess leaves from the cutting/seedling
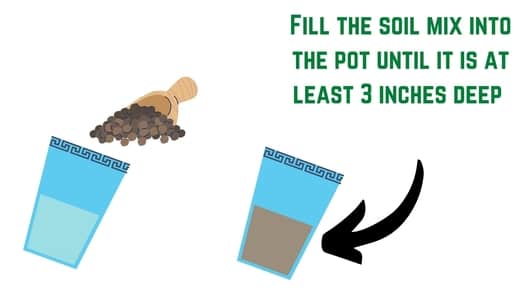
Fill a new soil pot with plenty of drainage holes with a wire mesh and fill loosely with bonsai potting soil or cactus soil.
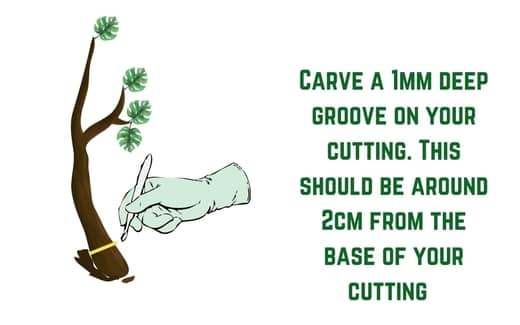
Remove the bottom 2 inches of bark and cambium from the cutting until the white inner wood is exposed.
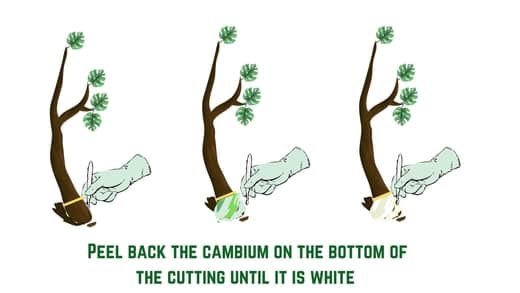
Apply rooting powder to this cut.
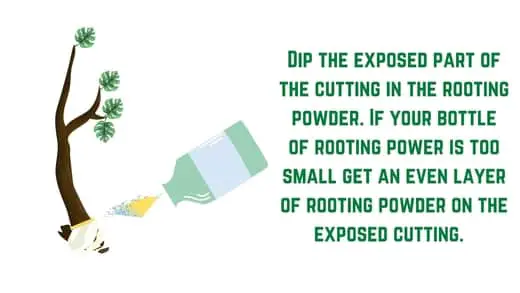
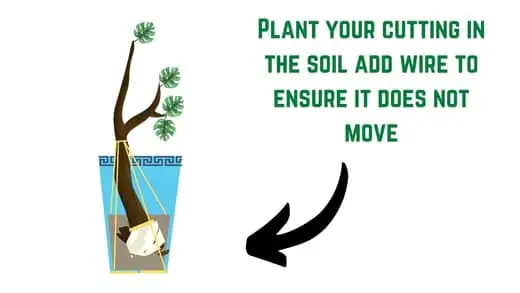
Plant your cutting in the pot and add wires to secure it in place – you may also need to top this up with more soil and remove any air pockets.
The place in a dish for two weeks with root hormone and water solution – after 2 weeks your cutting should have started to sprout new roots.

Similarly to planting a store-bought tree you then need to let this grow for a year or two to strengthen before we start the sumo bonsai process.
Fertilize your bonsai thoroughly
Now you have planted your seedling cutting or store-bought tree – and given it about 2 years to grow and strengthen in its new pot, it’s important you also regularly fertilize your tree.
Sumo bonsai requires a lot of fertilizer to help grow and create a thick trunk.
As such, during the summer growing months ensure you fertilize your tree no more than once per month.
Widen the trunk of your tree using a sacrifice branch
Your bonsai tree should now be primed for using the sumo technique.
The first thing we need to do then takes a few years to widen the size of our bonsai trunk.
Easily the best step to start this process is to grow out a sacrifice branch.
Sacrifice branches are branches of your bonsai that you grow out that will thicken the size of your trunk.
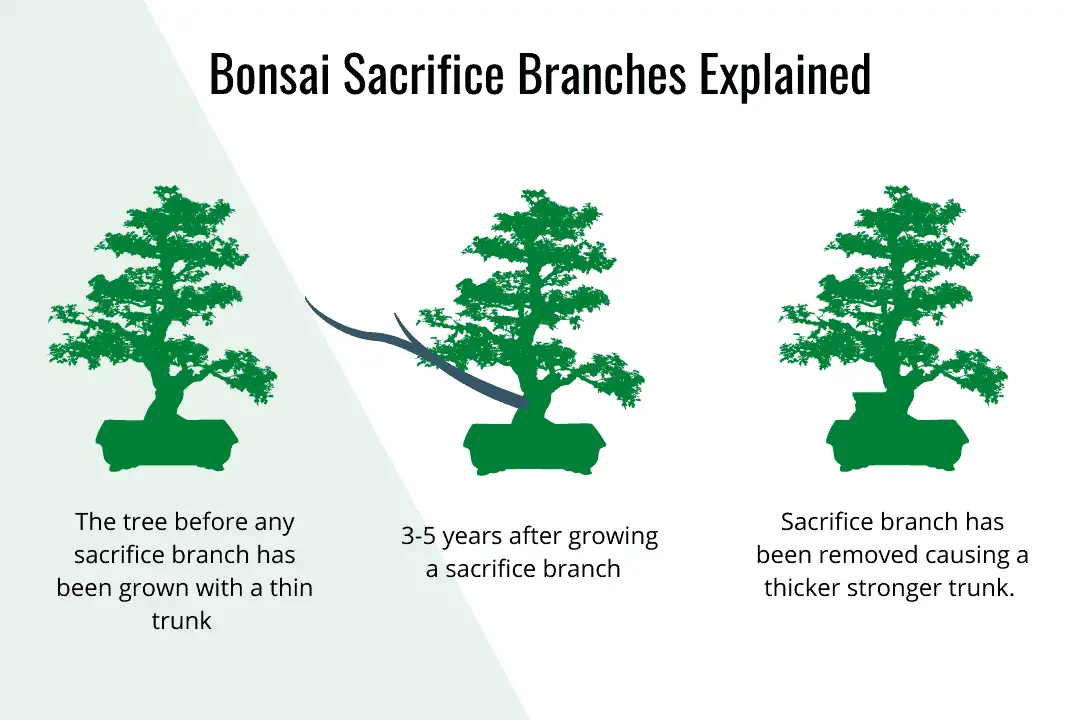
Ideally, you want to do this for about 5 years in total to create a strong thick trunk.
You can then further speed up the process by growing out multiple sacrifice branches.
Then after 5 years, you should have a thick sized trunk
Prune the tree back
Once your tree has grown for 5 years with a sacrifice branch I would recommend using a sharp pair of cutting shears and removing these branches.
after 5 years the sacrifice branches will have grown out as fair as they will have during this process.
Keep in mind you may have needed to report your bonsai around 2 times during the process of growing the sacrifice branch out.
I would also use this time to prune back a few of the branches of your tree, using the design you created before and your tree a little more.
Keep in mind, any pruning on the tree should be done during the spring/summer only.
Widen the trunk of your tree using a bonsai tourniquet
For a lot of you, your bonsai trunk will be thick enough to move on to the next stage.
If however, you are unhappy with the look of your tree you can follow the tourniquet method. To further thicken your tree.
To follow this, simply apply a copper wire around the part of the trunk you want to thicken up.
This will block off the circulation o nutrients to the higher parts of your tree causing the bottom of your trunk to enlarge in size.
Aim to keep this on for about a year and only start this process during the early spring.
Chop your bonsai trunk
Now you will have a fantastically thick bonsai trunk, but will likely not have a tapered bonsai that sumo bonsai have.
To achieve this simply use the bling chopping technique.
Chop the bonsai tree at a straight angle ensuring this is under any branches.
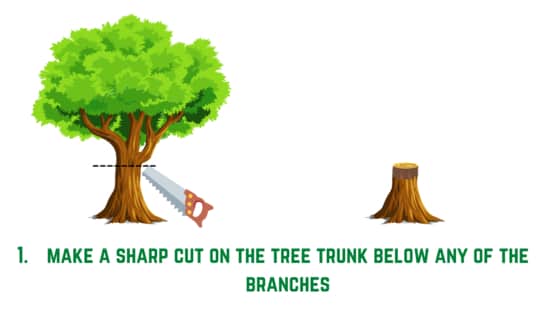
Apply cutting paste to the wound of the tree and then after a few weeks, new branches will grow wt the bottom of the trunk.
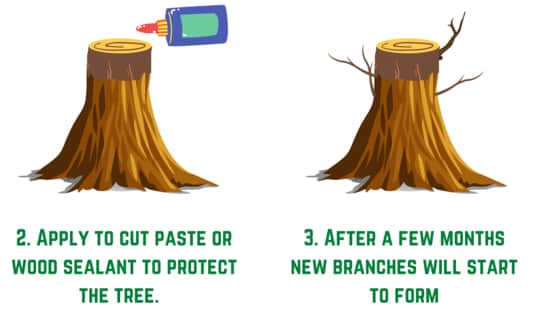
Let these branches grow out for 5 or 6 years and then use the v-cut chopping technique to merge the trunk with the new branch of your bonsai creating a beautiful taper to your sumo bonsai.
This process can be incredibly complex to follow so check out my post around bonsai trunk chopping here.
Create low branches
By this point, your sumo bonsai will have a nice thick trunk near the topsoil of your tree that slowly tapers.
The next characteristic we need to create is low branches.
Luckily, because of the trunk chopping method, we followed earlier, our bonsai will already have relatively low branches that are near the ground.
To further extenuate this, consider wiring your branches in place for a few months until they start to grow downwards.
Another great method to promote low branch growth would be to defoliate the leaves of the upper branches, leaving the lower branch leaves in place, this will create more growth in these lower branches.
As these lower branches are wired they will also grow in the specific way you would like.
Create a v-shaped canopy/crown
The final step to create a sumo bonsai using the sumo bonsai technique is to create a v-shaped crown/v-shaped canopy for your tree.
In sumo bonsai, this should almost look like a little v-shaped hat sitting atop your tree.
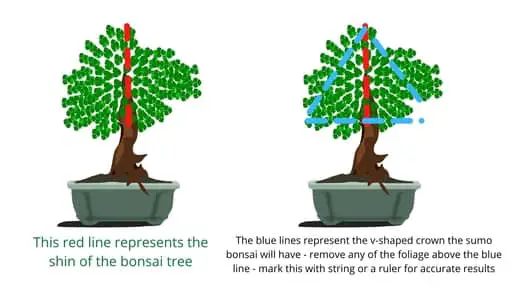
To do this, find the shin of your bonsai tree – this is the longest, tallest branch of your tree that is the top point of your tree.
Then, mark this point with string or yarn.
Attach the shin to the widest points of your bonsai and prune any branches that go over this size.
Ideally, I found using a ruler when you are first getting started to help with this process.
Be patient
Finally, it’s important to remover that creating any bonsai style, including the sumo bonsai technique, is incredibly time-consuming and can take years if not decades if you are growing your tree from scratch.
Each bonsai tree is different and while the points above will work for most trees as a general guideline, it’s important that you adapt and change these methods to meet the needs of your tree.
Is the trunk of your bonsai wide enough? Then you might not need to grow out any sacrifice branches or use a bonsai tourniquet.
Happy with the way the crown or canopy of your tree looks, then forget about pruning these back.
FAQ’s on sumo bonsai technique
So now you know the exact step-by-step process it takes to create a sumo bonsai, a lot of you will have further questions on creating sumo bonsai.
Hopefully, the questions below will help answer any you might have
What plant species work best for sumo bonsai?
Deciduous species such as elms, oaks, maples, and ficus work best for sumo bonsai. This is because they are strong enough to manage the constant chopping and pruning required to achieve the sumo bonsai technique. Avoid evergreen coniferous species such as pine or junipers.
Water requirements for sumo bonsai
Sumo bonsai, like other styles of bonsai, require constant watering. As such, ensure you check the topsoil for this style of bonsai daily, watering only when the topsoil is dry to touch. Ideally, rainwater works best for this style of bonsai.
To read up more on rainwater and bonsai, check out this post here.
Soil requirements for sumo bonsai technique
Sumo bonsai, like all bonsai styles and trees, will require a soil mix that provides the perfect balance between aeration, drainage, and moisture. A good volcanic rox mix such as a mix of akadama, volcanic rock and pumice will work well.
Cactus soil is another alternative that works well for all bonsai styles.
Sunlight requirements for sumo style bonsai
Sumo bonsai requires at least 6 hours of direct sunlight in the bright summer months. Aim then to keep sumo bonsai outdoors between June and August. Sumo bonsai can also be kept indoors so long as they are facing a south-facing window with a lot of sunlight.
Advantages of sumo bonsai?
The main advantages to a sumo bonsai style are:
- A rare style to come across nowadays. with people often for different styles
- Learning the sumo bonsai technique will teach you multiple skills required for the art of bonsai.
- Once a sumo bonsai tree has been completed it is relatively easy to maintain
- Very versatile as the species sussed for sumo bonsai technique are often incredible resilient
Disadvantages of sumo bonsai
Like all styles of bonsai, the sumo bonsai technique also has several drawbacks including:
- A larger trunk means more surface area for pests such as caterpillars, slugs, mice, rats, aphids, and spider mites.
- It takes a very long time to follow the sumo bonsai technique if you are growing it from scratch
- As there are a lot of steps required there is a higher chance of things going wrong with the process.
- Potential to kill the tree during the trunk growing process.
Is sumo bonsai hard to make for beginners?
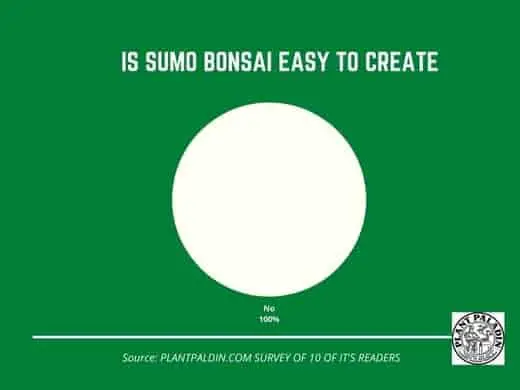
Sumo bonsai technique is not an easy technique to master and so is not particularly beginner-friendly. Several skills are required to master the creation of sumo bonsai style and so often several attempts may result in failure before a successful sumo bonsai can be achieved.
How big should sumo bonsai be?
Sumo bonsai should be between 5 and 18 inches. They fall into the small and medium-sized bonsai category (one-handed to two-handed. Sumo bonsai will typically fall into the Chohin, Kumono, and Katade-mochi categories.
Should you use large cuttings for sumo bonsai?
Large cuttings can be used for the sumo bonsai technique. Using large cuttings for sumo bonsai can speed up the process of creating a wide thick tapered trunk and can save years on the progression and growth of your tree.
Should you keep a sumo bonsai outdoors or indoors?
Sumo bonsai will benefit more from benign kept outdoor than indoors. This is because these three species have significant light requirements and so an outdoor space works best for the health of these trees.
Keeping this bonsai style indoors is possible, so long as you use a species that is resilient enough to live indoors such as a jade plant.
Having a sumo bonsai outdoors will also have several health benefits such as cleaning the air quality, boosting your mood and, improving your ability to learn.
Study on sumo bonsai
Finally, I didn’t just want to give my thoughts on sumo bonsai but got in touch with a few experts to ask them their opinion of keeping sumo bonsai.
First I got in touch with my local botanical gardens – here was their thoughts:
“Sumo bonsai can be very difficult to grow if you are new to bonsai, we would recommend using an older tree to start creating a sumo bonsai.”
I also did a quick survey of ten plant paladin readers and asked them if the sumo bonsai technique was easy or difficult – here were their thoughts:
My top picks for the gear you will need!
So like I mentioned earlier, over the past three years of running PlantPaladin, hundreds of people have asked me for my recommendations on the best bonsai gear on the market.
Having spent thousands of dollars on bonsai items these past few years and tested at least 100 bonsai-specific products, I’ve listed my favorite products below – All of which I highly recommend and think you can get great value.
They can purchase directly by clicking the link to take them to Amazon.
Bonsai Tool Set: One of the significant challenges I’ve had is finding a toolset that was not only durable but didn’t break the bank. SOLIGT has recently developed a fantastic bonsai tool set that covers all the tools you need to trim, prune, and repot your trees. – You can grab it here.
Complete Bonsai Set: Many of you will want to grow your bonsai trees entirely from scratch, but finding the varicose seeds, pots, and other items in one place can be challenging. Leaves and Sole then have created a complete bonsai set that I’ve personally used that ticks all the boxes. You can grab it here.
Bonsai wire: The number of times I’ve run out of wire for my bonsai or purchased cheap bonsai wire that doesn’t do the job is embarrassing for me to admit. After a lot of trial and error, I found that using Hotop’s aluminum bonsai wire is one of the best options on the market. This can easily be used for both indoor and outdoor bonsai. You can grab it here.
This post was written by Fehed Nicass who has been passionate about bonsai for over 3 years.
