This website is supported by its readers. If you click one of my links I may earn a commission. I am also a participant in the Amazon affiliates program and I will also earn a commission from qualified purchases.
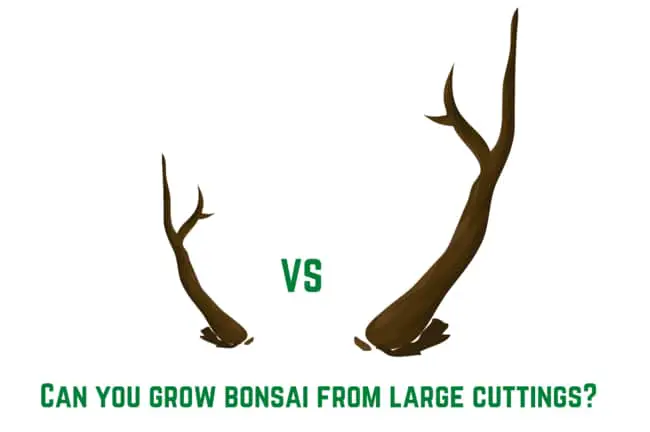
Making bonsai trees from cuttings or Shashki as it’s known in Japan, might seem complex, but is a relatively easy process. Typically you would make cuttings in the early spring that are around 2 to 4 inches long and an eighth of an inch wide. Plant them in a new pot and after a few weeks, they will start to sprout! But what if you use cuttings that are larger in size than smaller 2 to 4-inch cuttings. Can you make bonsai from large cuttings?
Creating a bonsai tree from cuttings that are larger in size (5 to 15 inches long) than traditional cuttings (2 to 4 inches long), whilst challenging, can definitely be achieved. To maximize your chances of success ensure you use root hormone.
So what exactly is the process of making bonsai from large cuttings? And is making bonsai with larger cuttings better than creating bonsai with smaller cuttings? Keep reading to find out more!
Just a quick heads up, over the past three years of running Plantpaladin, hundreds of people have asked for product recommendations. As such, You can find my favorite indoor bonsai tree here (link takes you to Bonsaiboy), my favorite outdoor bonsai tree (link takes you to Bonsaiboy), or have a look at all the products I recommend here.
How to make bonsai from large cuttings?
The basic process of making bonsai from large cuttings is generally the same as making bonsai with smaller cuttings with a few key differences.
Mainly that you will have to tie your large cuttings down to ensure they don’t move and use a lot more root powder or hormone to help propagate your tree.
The general process then is as follows:
- Ensure it is the right time of the year
- Decide on the tree you want to take large cuttings from
- Decide on the size of the cuttings
- Make a cutting at a 45-degree angle
- Remove and excess leaves
- Use large pots to grow the cuttings
- Add your bonsai soil mix
- Prepare the base of your large cuttings
- Dip in root powder
- Plant the cutting in the soil.
- Apply root hormone
- Keep in a propagator for four to six weeks
- Ease your plant into the sunlight
Let’s explore these in more detail below.
Ensure it is the right time of the year
The first step to ensuring that you are successful in making bonsai from large cuttings is just to check it’s the right time of the year.
Large cuttings will need more time and more care to help them sprout new roots and grow and so the earlier you can start the process in the spring the better.
Ideally cutting large bonsai cuttings should be done as early into the spring as possible – I found that the first few weeks of March typically work best for me.
Decide on the tree for the large cuttings
So we now know when to start the cutting process. The next thing you need to decide is the type of tree you will use.
People often use cuttings because they want to replicate the looks of other bonsai trees within their collection.
For large cuttings then I would recommend using four-hand, six-hand, or eight-hand bonsai also known as Dai or Omono, Hachi-uye, and imperial bonsai.
This will give you the cuttings large enough to take from primary, secondary, or tertiary branches.
Now understanding the different sizes of bonsai trees can be confusing so check out my bonsai size classification guide or my bonsai growth guide here.
You can also have a look at the table below to help show the best bonsai to go for – I’ve highlighted the bonsai sizes in green.
| Classification | Size inches | Size Centimeters | Hand size | General size |
| Keshitsubo | 1 to 3 inches | 3 to 8 centimeters | Fingertip | Tiny |
| Shito | 2 to 4 inches | 5 to 10 centimeters | One-hand | Tiny |
| Mame | 2 to 6 inches | 5 to 15 centimeters | One-hand | Small |
| Chohin | 5 to 8 inches | 13 to 20 centimeters | One-hand | Small |
| Kumono | 6 to 10 inches | 15 to 25 centimeters | One-hand | Small |
| Katade-mochi | 10 to 18 inches | 25 to 46 centimeters | Two-hand | Medium |
| Chiu or Chumono | 16 to 36 inches | 41 to 91 centimeters | Two-hand | Medium |
| Dai or Omono | 30 to 48 inches | 76 to 122 centimeters | Four-hand | Large |
| Hachi-uye | 40 to 60 inches | 102 to 152 centimeters | Six-hand | Large |
| Imperial | 60 to 80 inches | 152 to 203 centimeters | Eight-hand | Large |
It’s also important that if you do use larger size bonsai cuttings you will need to cut this from a bonsai that is at least 20 years or older in order to have branches that are that large.
What bonsai tree species work best for cuttings?
So we know the size of the bonsai you want but what about the species.
After all, you can have a really nice bonsai in your collection but if it’s not suited for the cutting process, then your cuttings will not survive – even if you use small cuttings.
I found the following trees then root easily and make perfect candidates for cuttings.
Chinese Elm, Ficus, Azalea, Larch, and Carmona trees are all fantastic bonsai tree species to use for cuttings. This is because these plants all root very easily and have been known to grow in touch conditions. Most fruit species also work particularly well.
List of bonsai trees that work best for cuttings
Most deciduous trees such as:
- Chinese Elms
- Japanese Elms
- Other Elm Species
- Larch
- Willow
- Zelkova
- Carmona
- Ficus
- Sagertia Theezans
Most fruit trees such as:
- Crab apple
- Lime
- Lemon
- Orange
- Plum
- Cherry
- Olive
- Pomegranate
- Apple
Shrubs such as:
- Azalea
- Cotoneaster
- Boxwood
- Honeysuckle
- Privet
What bonsai tree species should you avoid for cuttings?
Maples, oaks, pines and junipers, and other evergreen bonsai species should be avoided for cuttings. These bonsai tree species do not root easily and in some cases take over a year to sprout new roots.
A full list then of tree you should avoid include evergreen species such as:
- Junipers
- Cedar
- Pines
Other species that should be avoided include:
- Beech
- Birch
- Maples
- Oaks
Decide on the size of the cuttings
Once you’ve decided on the tree species that you want to use for large cuttings you need to decide on the size of the cuttings.
Now cuttings will always work best when smaller cuttings are used – this is why most cuttings are typically two to four inches long and are about as wide as a matchstick.
That being said, this post is all about how to use large cuttings for bonsai.
My recommendation then, if you do decide to use large cuttings for bonsai, would be to opt for a branch that is about 5 to 15 inches long and about 1 to 3 centimeters thick.
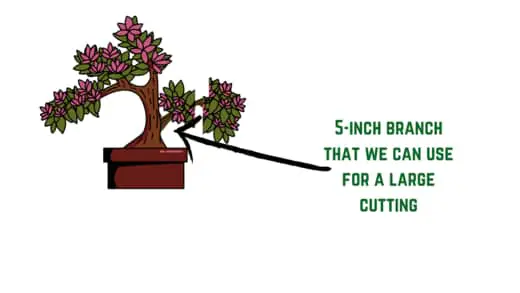
At this size, you should still be able to propagate a new bonsai.
Make a cutting at a 45-degree angle
Once you know the branch you will be using, cut the branch at a 45-degree angle.
I found that doing this will often give the best result when planting the cutting in new soil – especially when using larger cuttings.
To do this simply use a sharp pair of gardening or bonsai shears to make one clean cut.
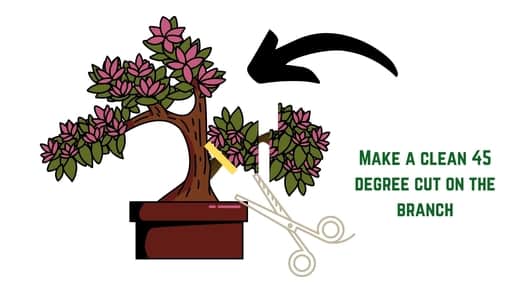
Aim to do this a few centimeters away from the main trunk to avoid damaging the doner tree.
Remove any excess leaves
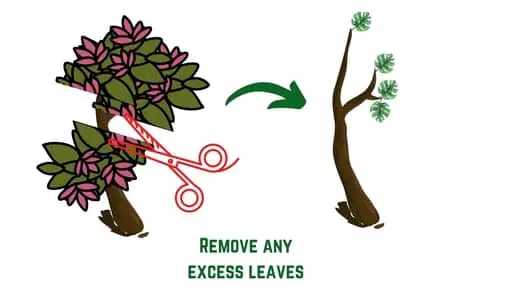
Now that you have taken your cutting the next step is to remove the leaves and trim them back.
Now you won’t need to do this for all the leaves, just the leaves that are nearer the bottom of the branch.
This is to ensure you can spot new growth and also not worry about your new cutting using too much of its stored energy in the photosynthesis process at this difficult stage.
Use large pots to plant the cuttings
Next, you have to prepare the pots to use for the larger cuttings.
Typically when using cuttings, small plant pots used for fingertip-sized bonsai will work best but as we are using larger cuttings larger pots will be required.
A sneaky trick I found is that most large yogurt pots work incredibly well for this.

Simply pierce a few holes in the bottom of the pot for drainage using a skewer or knife and this will make the perfect size for larger cuttings.
Now I know understanding the number of holes your pot will need can be challenging so hopefully the below graph will help – feel free to check out this post on drainage holes for full insight.
| Classification | Size inches | Number of penny-sized holes | Number of pencil-sized holes |
| Keshitsubo | 1 to 3 inches | 1-2 | 0 |
| Shito | 2 to 4 inches | 1-2 | 0 |
| Mame | 2 to 6 inches | 2 | 2 |
| Chohin | 5 to 8 inches | 2 | 2 |
| Kumono | 6 to 10 inches | 2 | 2 |
| Katade-mochi | 10 to 18 inches | 2 | 3 |
| Chiu or Chumono | 16 to 36 inches | 2 | 4 |
| Dai or Omono | 30 to 48 inches | 3 | 6 |
| Hachi-uye | 40 to 60 inches | 4 | 8 |
| Imperial | 60 to 80 inches | 6 | 8 |
Add your bonsai soil mix
In your pot then, you need to put in your bonsai soil.
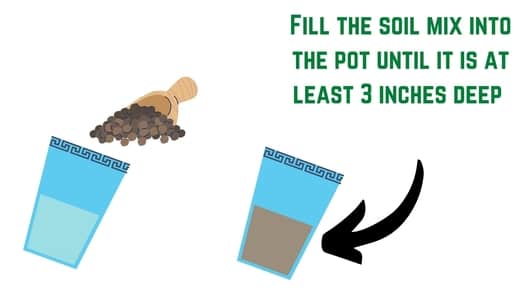
Ideally, your pot needs to be filled until it is at least 3 inches deep.
Smaller cuttings only need to be covered for 2 inches but because we are using larger cuttings 3 to 5 inches of depth is required as a minimum (it’s one of the reasons we are using larger pots).
What soil mix works best for large bonsai cuttings?
The best soil mix to use for large bonsai cuttings would be a 50/50 mix of akadama inorganic material and organic soil such as peat soil. Ensure you sieve the soil mix to remove any dust dirt or debris that may have been mixed together.
Another great option I found is to use cactus soil which also works as a fantastic mix for bonsai.
Ensure then that your soil is packed tightly into the pot and then wet the soil.
Now at this stage, I would also add fertilizer for your soil to help the roots when they first start to sprout – think of it as giving your bonsai a helping hand when it first starts to bloom.
Prepare the large bonsai cuttings to be planted
The next step is the most complicated of the process but easily one of the most important.
Using a sharp carving knife, you need to remove the cambium (aka the green stuff) from the bottom 2 to 3cm from your cuttings.
To start then carve all the way around your bonsai cuttings around 2cm from the bottom of the cutting.
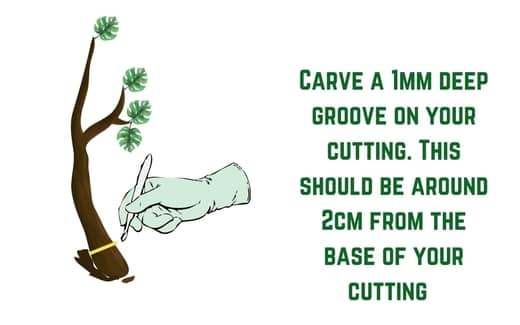
Aim for this to be around 1mm deep – this is the same process that you would follow using a bonsai deadwood technique such as jin or sabamiki.
Then you want to remove the cambium of your bonsai tree from the carve you made.
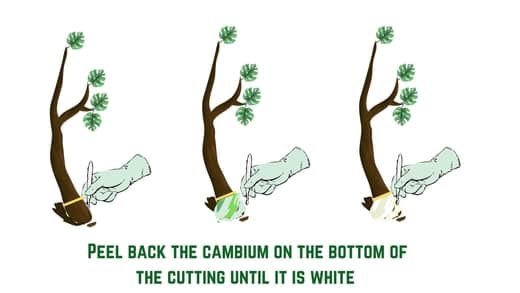
The aim of this is to remove all parts of the cambium including the living phloem, the xylem – the aim is anything green you want to get rid of leaving a nice white inner wood.
Apply rooting powder
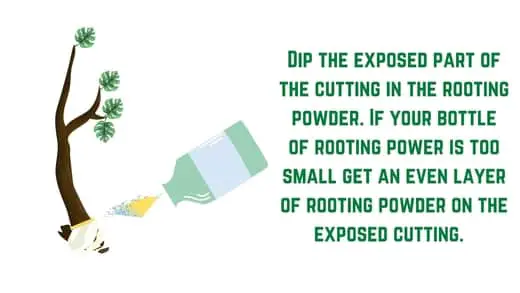
Now the bottom of the large cuttings is exposed in order to maximize growth we need to apply rooting powder.
The rooting powder contains IBA better known as indole butyric acid which helps bonsai trees sprout and grow roots.
If you had smaller cuttings I would recommend one dip and that’s it, but seeing as though we are using larger cuttings, dip your cuttings in the rooting powder 3 to 4 times.
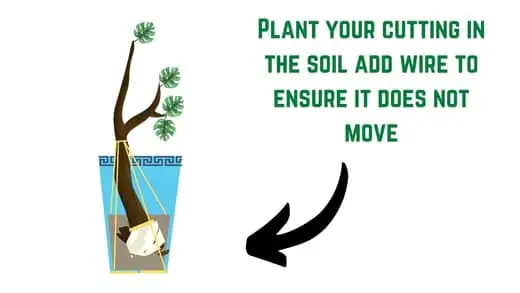
Plant your cuttings in the soil
Next, simply plant your bonsai in the soil.
As our cuttings are larger, it’s even more important that our cutting does not move for a few weeks.
The best way to do this is to plant the soil as tightly as possible so the cutting will not move.
I’d also recommend either using copper or plastic wire to keep your bonsai in place.
Hopefully, the image below will help.
This process will be quite similar to repotting bonsai which you can find out more about here.
Apply root hormone
Wait a second didn’t we just cover this?
As our bonsai tree cuttings are larger we need to give them a little extra push in order to grow them out.
This is why we will be using both root powder and root hormone as a way to grow the large cuttings.
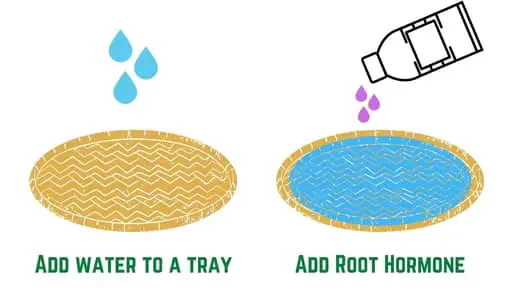
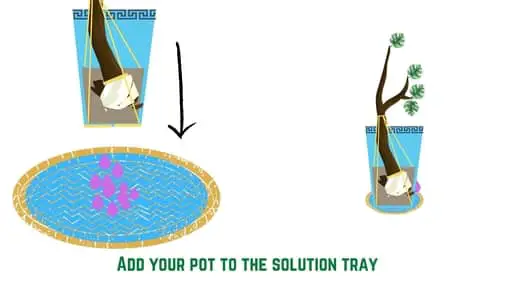
To apply root hormone then the first thing we need to do is pour water in a tray that we will put our bonsai tray on.
This should be deep enough to cover the holes of the yogurt or plant pot we put our bonsai in before.
Then pour 3 to 4 drops of root hormone in the water to create a root hormone solution for your bonsai.
Finally, place the pot your large cuttings are in on top of the root hormone tray.
Keep in a propagator for 4 to 6 weeks
Now your bonsai has been prepared it is easily at its most vulnerable state.
Around 90% of bonsai trees grown from cuttings survive into full-grown trees.
This however is only true for bonsai trees made of small cuttings, not the large cuttings we’re talking about in this post.
Larger bonsai tree cutting survival rates are much smaller.
To maximize your larger bonsai cutting chances of success I would recommend for the first 4 to 6 weeks of the spring to keep your bonsai in a plant propagator.
This will allow you to manage the moisture, temperature, and sunlight levels for your tree giving them the best chance of survival and sprouting roots.
Ease your bonsai cuttings into the sunlight
After 4 to 6 weeks your large bonsai cuttings should have started to sprout roots.
This then is the perfect time to ease them outdoors to give them the benefits of natural sunlight.
The reason we start the cutting process as early in the spring as possible is so that when we do introduce our bonsai in the summer, we don’t have to worry about it being excessively hot when they are ready to be let outdoors.
When bringing your cuttings outdoors then, ease them into the new climate.
Start by keeping them in the shade for about a week.
Then split them between the shade and direct sunlight a few days per week.
Finally, you should be able to keep them in the sunlight like you would do a normal plant by the third week.
Then it is just a case of maintaining and growing the tree, check you are watering (but don’t overwater) your bonsai, keeping it clear of insect infestations like scale, aphids, slugs, or spider mites, and avoiding any fungal or mold infection.
What is the difference between large cuttings and small bonsai cuttings?
Large bonsai cuttings tend to be 5 to 15 inches when compared to smaller bonsai cuttings which are 2 to 4 inches in size. Smaller bonsai cuttings are easier to propagate new roots from the larger bonsai cuttings.
What is classified as a large bonsai cutting?
Large bonsai cuttings are bonsai that are more than 2 to 4 inches in size. Large bonsai cuttings typically are between 5 and 15 inches long and 1 to 2cm wide.
How big is too big for large bonsai cuttings?
Bonsai cutting larger than fifteen inches long and two centimeters wide will very rarely sprout new roots. Instead, tree trunks with existing roots are often used to create new larger bonsai. Creating bonsai works best when smaller-sized cuttings that are two to four inches long are used.
“Smaller bonsai cuttings have a 90% success rate when it comes to propagating them.”
What part of the bonsai should you use for cuttings?
Primary, secondary or tertiary branches work best for bonsai cuttings and growing new bonsai from them. Cuttings should be taken from lower down the tree where possible and a 45-degree cut should be made for the best chances of success.
When should you use large bonsai cuttings over smaller cuttings?
Large bonsai cuttings should only be used if you cannot resource or find smaller bonsai cuttings to grow new bonsai. This is because there is a much smaller chance of larger bonsai cuttings sprouting and extra care will be needed in order to grow effectively.
Why do people want to grow bonsai trees from cuttings?
Bonsai owners grow bonsai trees from cuttings to replicate or clone the look of an existing bonsai in their collection. Using cuttings also helps save time in the growing process and is relatively inexpensive to do.
Are larger cuttings better than smaller cuttings?
Larger cuttings are not better than smaller cuttings for bonsai propagation purposes. Larger bonsai cuttings often take a lot more care and attention in order to sprout when compared to smaller bonsai cuttings. Smaller bonsai cuttings typically have a 90% success rate.
When is the best time for bonsai cuttings?
The best time to start the cutting process for bonsai trees is early spring. This will give the cutting enough time to sprout and still get the benefits of the spring/summer growing season. Bonsai cuttings should never be undertaken in the fall or winter.
What do the experts say?
Now I didn’t just want to use my history and experience when it came to making bonsai from large cuttings.
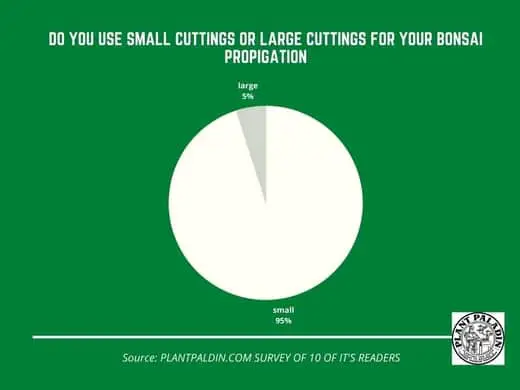
As such I asked 20 pant paladin readers if they use large or small size plant cuttings to grow new bonsai here were the results:
Secondly, I visited Kew Gardens and asked an employee working there the best size for bonsai and if it was possible to grow bonsai with larger cuttings – here was the response:
“Growing bonsai from cuttings works best when you use smaller cuttings or seedlings. It’s not impossible to grow bonsai out of larger cuttings but it will be a lot more work and you a lot more likely to fail”
My top picks for the gear you will need!
So like I mentioned earlier, over the past three years of running PlantPaladin, hundreds of people have asked me for my recommendations on the best bonsai gear on the market.
Having spent thousands of dollars on bonsai items these past few years and tested at least 100 bonsai-specific products, I’ve listed my favorite products below – All of which I highly recommend and think you can get great value.
They can purchase directly by clicking the link to take them to Amazon.
Bonsai Tool Set: One of the significant challenges I’ve had is finding a toolset that was not only durable but didn’t break the bank. SOLIGT has recently developed a fantastic bonsai tool set that covers all the tools you need to trim, prune, and repot your trees. – You can grab it here.
Complete Bonsai Set: Many of you will want to grow your bonsai trees entirely from scratch, but finding the varicose seeds, pots, and other items in one place can be challenging. Leaves and Sole then have created a complete bonsai set that I’ve personally used that ticks all the boxes. You can grab it here.
Bonsai wire: The number of times I’ve run out of wire for my bonsai or purchased cheap bonsai wire that doesn’t do the job is embarrassing for me to admit. After a lot of trial and error, I found that using Hotop’s aluminum bonsai wire is one of the best options on the market. This can easily be used for both indoor and outdoor bonsai. You can grab it here.
This post was written by Fehed Nicass who has been passionate about bonsai for over 2 years.
